

Table of Contents
Intro
There is something deeply comforting about making treats for the ones you love—and yes, that absolutely includes our dogs. As a female chef who spends her days in the kitchen, I can tell you that creating homemade snacks for my pup brings me just as much joy as cooking for my family. These Beef and Vegetable Chew Sticks for Dogs are one of my go-to recipes when I want something wholesome, satisfying, and tail-wag approved.
I still remember the first time I made these chew sticks. My dog sat patiently (well… mostly patiently) by the oven, nose twitching as the aroma of slow-baked beef and vegetables filled the kitchen. The smell is rich, meaty, and slightly sweet from the carrots—it’s honestly tempting even for humans, though I promise these are best left for your furry friend.
The beauty of this recipe is in its simplicity. We’re talking real ingredients—ground beef, fresh vegetables, and a little love. No preservatives, no mystery fillers, just clean, nourishing goodness shaped into chewy sticks that dogs absolutely adore.
If you’ve ever wondered how to make healthy dog treats at home, you’re in the right place. Let’s roll up our sleeves and get cooking.
What is Beef and Vegetable Chew Sticks for Dogs?
Beef and Vegetable Chew Sticks for Dogs are homemade, baked dog treats designed to be both nutritious and long-lasting. Unlike store-bought chews that can be packed with artificial additives, these are made using whole, recognizable ingredients.
Think of them as a cross between a jerky stick and a soft biscuit. The ground beef provides protein and flavor, while vegetables like carrots and spinach add vitamins, fiber, and a subtle sweetness that balances the richness of the meat.
They are baked low and slow, which gives them that chewy texture dogs love. You can adjust the baking time depending on whether your dog prefers softer or firmer treats.
What I love most? You know exactly what’s going into your dog’s body. As someone who cares deeply about nutrition, that peace of mind is priceless.
Equipment List
Before we begin, let’s gather everything you need. Nothing fancy here—just simple kitchen tools:
- Large mixing bowl
- Wooden spoon or spatula
- Box grater (for vegetables)
- Baking tray
- Parchment paper
- Knife or pizza cutter
- Measuring cups and spoons
- Oven
Optional but helpful:
- Food processor (for finely chopping veggies)
- Silicone baking mat
Recipe Card Info
Prep Time: 20 minutes
Cook Time: 2 hours
Total Time: 2 hours 20 minutes
Serves: 20–25 chew sticks
Cuisine: Pet Food / Homemade Dog Treats
Course: Dog Snack
Calories: 45 calories per stick
Ingredients
Here’s what you’ll need to make these flavorful chew sticks:
- 2 cups ground beef (lean preferred)
- 1/2 cup finely grated carrot
- 1/4 cup finely chopped spinach
- 1/2 cup oat flour (or blended oats)
- 1 egg
- 1 tablespoon olive oil
- 1/4 cup water (as needed for consistency)
Optional add-ins:
- 1 tablespoon ground flaxseed (for extra fiber)
- 1 tablespoon parsley (for fresh breath support)
Instructions
Let’s walk through this step by step. Take your time—this is a relaxing recipe.
Step 1: Preheat the Oven
Set your oven to 160°C (320°F). Line a baking tray with parchment paper.
Step 2: Prepare the Vegetables
Grate the carrot finely and chop the spinach into very small pieces. You want everything to blend smoothly into the dough.
Step 3: Mix the Ingredients
In a large bowl, combine the ground beef, grated carrot, spinach, oat flour, egg, and olive oil. Mix well until everything is evenly incorporated.
If the mixture feels too dry, add a little water—just enough to bring it together into a workable dough.
Step 4: Shape the Chew Sticks
Transfer the mixture onto a lined baking tray. Press it down evenly to about 1/2 inch thickness.
Using a knife or pizza cutter, score the mixture into stick shapes. This makes it easier to break apart after baking.
Step 5: Bake Low and Slow
Place the tray in the oven and bake for about 2 hours. This slow baking process removes moisture and creates that chewy texture.
Step 6: Cool and Break Apart
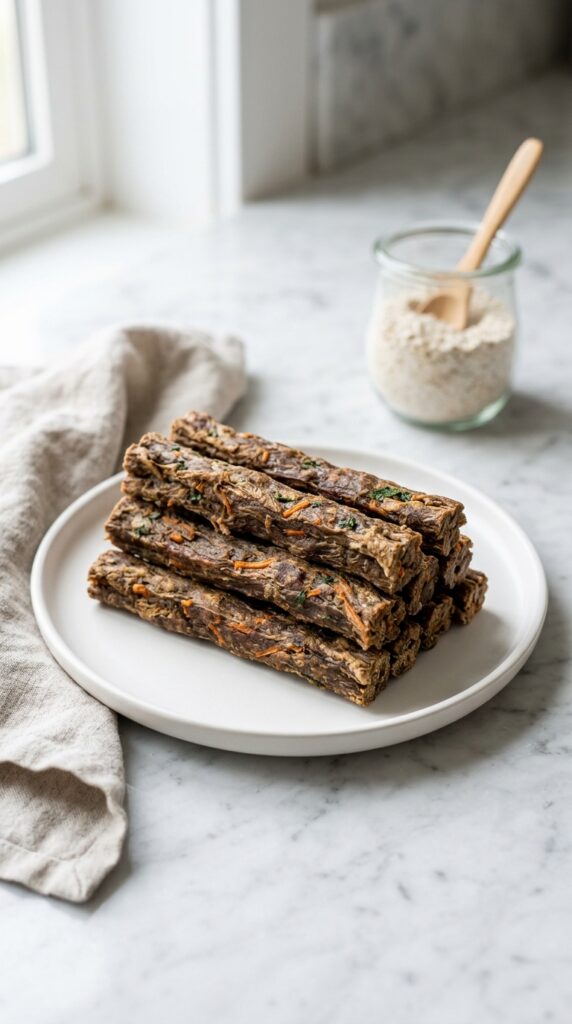
Remove from the oven and let it cool completely. Once cooled, break along the scored lines into chew sticks.
Why I Love Making These at Home
As a chef, I’m used to crafting dishes with precision and care—but when it comes to my dog, it becomes something even more personal. Making Beef and Vegetable Chew Sticks for Dogs at home allows me to control every ingredient, ensuring freshness and quality.
There’s also something incredibly rewarding about seeing your dog enjoy something you made from scratch. The excitement, the wagging tail—it’s instant feedback, and it never gets old.
Flavor Profile and Texture
Let’s talk flavor—yes, even for dog treats!
These chew sticks are rich and savory from the beef, with a gentle sweetness from the carrots. The spinach adds an earthy undertone, while the oat flour brings everything together with a mild, nutty base.
Texture-wise, they’re firm yet chewy. Not too hard, not too soft—just the right balance to keep your dog happily occupied.
Nutritional Benefits
Every ingredient in this recipe serves a purpose:
- Beef: High in protein, supports muscle health
- Carrots: Rich in beta-carotene and fiber
- Spinach: Packed with vitamins A, C, and K
- Oats: Gentle on digestion, great source of fiber
- Egg: Adds protein and helps bind the mixture
These Beef and Vegetable Chew Sticks for Dogs are not just tasty—they’re nourishing too.
Storage Tips
Once cooled, store the chew sticks in an airtight container.
- Room temperature: Up to 3 days
- Refrigerator: Up to 1 week
- Freezer: Up to 3 months
I personally like to freeze a batch and thaw as needed. It keeps them fresh and ready to go.
Variations to Try
Want to switch things up? Here are a few ideas:
- Swap beef for ground chicken or turkey
- Add mashed sweet potato for extra softness
- Include pumpkin puree for digestion support
Just keep the consistency similar so the sticks hold their shape.
Tips for Perfect Chew Sticks
- Use lean meat to avoid excess grease
- Chop vegetables finely for better texture
- Bake longer for harder chews
- Always let them cool completely before serving
Are These Safe for All Dogs?
Generally, yes—but always consider your dog’s dietary needs. If your dog has allergies or specific health concerns, consult your vet before introducing new treats.
FAQs
Can I make these grain-free?
Yes! Replace oat flour with coconut flour or chickpea flour.
How do I make them crunchier?
Bake them longer at a slightly lower temperature to remove more moisture.
Can puppies eat these?
Yes, but make them softer by reducing bake time.
How often can I give these treats?
Moderation is key. Treats should make up no more than 10% of your dog’s daily diet.
Final Thoughts
Making Beef and Vegetable Chew Sticks for Dogs is more than just a recipe—it’s a way to show love in the most heartfelt, homemade way. As someone who lives and breathes cooking, I find so much joy in creating something simple yet meaningful.
Your dog may not say thank you with words, but trust me—you’ll see it in their eyes, their wagging tail, and their excitement every time you reach for one of these delicious chew sticks.
Happy cooking—and even happier tails!

Beef and Vegetable Chew Sticks for Dogs
Equipment
- Large mixing bowl
- Wooden spoon or spatula
- Box grater (for vegetables)
- Baking tray
- Parchment paper
- Knife or pizza cutter
- Measuring Cups and Spoons
- Oven
- Optional but helpful:
Ingredients
- 2 cups ground beef lean preferred
- 1/2 cup finely grated carrot
- 1/4 cup finely chopped spinach
- 1/2 cup oat flour or blended oats
- 1 egg
- 1 tablespoon olive oil
- 1/4 cup water as needed for consistency
Optional add-ins:
- 1 tablespoon ground flaxseed for extra fiber
- 1 tablespoon parsley for fresh breath support
Instructions
Step 1: Preheat the Oven
- Set your oven to 160°C (320°F). Line a baking tray with parchment paper.
Step 2: Prepare the Vegetables
- Grate the carrot finely and chop the spinach into very small pieces. You want everything to blend smoothly into the dough.
Step 3: Mix the Ingredients
- In a large bowl, combine the ground beef, grated carrot, spinach, oat flour, egg, and olive oil. Mix well until everything is evenly incorporated.
- If the mixture feels too dry, add a little water—just enough to bring it together into a workable dough.
Step 4: Shape the Chew Sticks
- Transfer the mixture onto a lined baking tray. Press it down evenly to about 1/2 inch thickness.
- Using a knife or pizza cutter, score the mixture into stick shapes. This makes it easier to break apart after baking.
Step 5: Bake Low and Slow
- Place the tray in the oven and bake for about 2 hours. This slow baking process removes moisture and creates that chewy texture.
Step 6: Cool and Break Apart
- Remove from the oven and let it cool completely. Once cooled, break along the scored lines into chew sticks.
Notes
- Use lean meat to avoid excess grease
- Chop vegetables finely for better texture
- Bake longer for harder chews
- Always let them cool completely before serving

Norma Parker is a recipe creator at Nomqom.com. She shares simple, tasty, and easy home-cooking ideas for everyday meals. Her goal is to help home cooks make delicious food with confidence.