
Table of Contents
Intro
The first time I tasted Chick-fil-A Mac and Cheese, I remember pausing mid-bite. You know that moment when everything else fades and all you can focus on is the creamy, cheesy comfort happening in your mouth? That was me.
As a chef and a lifelong mac and cheese lover, I’m not easily impressed. But this one? It was rich, velvety, deeply cheesy, and had that irresistible golden top that feels like a warm hug.
Naturally, I had to recreate it at home.
After testing batches in my own kitchen—tweaking the cheese blend, adjusting the creaminess, perfecting the baked top—I finally landed on a version that tastes just like the real thing, maybe even a little better (don’t tell anyone). Today, I’m sharing my personal, from-scratch version so you can bring that same comfort to your table.
This is not just a side dish. It’s a mood. It’s Sunday dinner energy. It’s the kind of recipe that makes people go back for seconds before they finish their first plate.
Let’s get into it.
What is Chick-fil-A Mac and Cheese?
If you’ve ever ordered it, you already know—it’s not your average boxed macaroni.
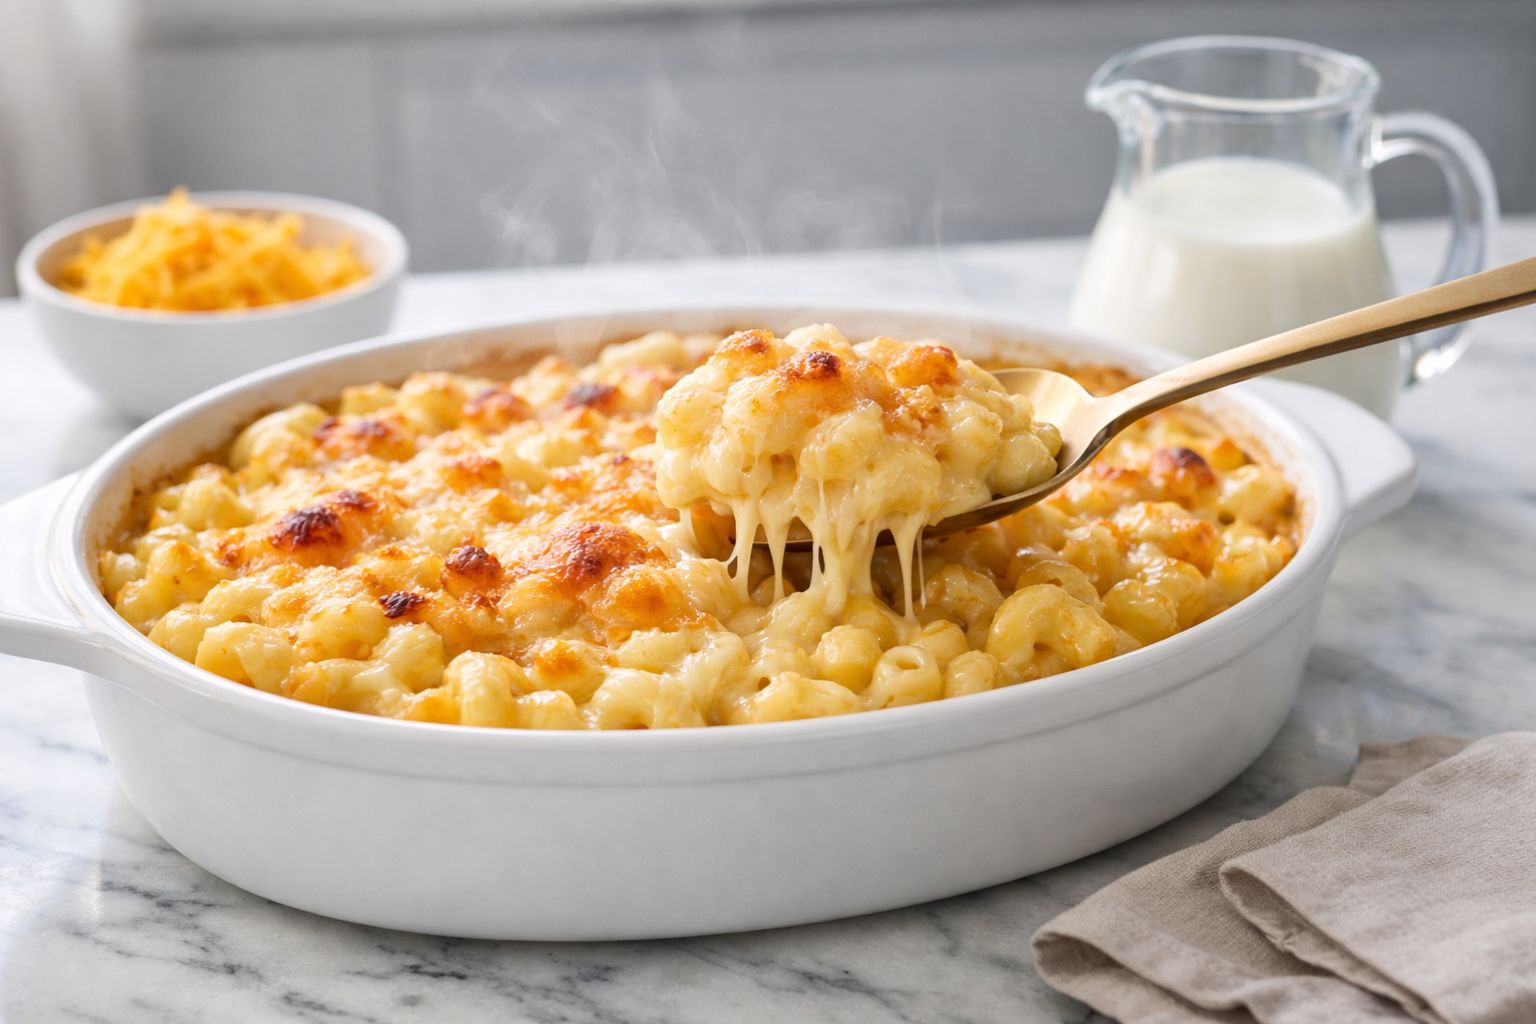
Chick-fil-A Mac and Cheese is a baked macaroni and cheese made with a blend of cheeses, including cheddar, Parmesan, and Romano. It’s ultra creamy underneath with a lightly browned, slightly crispy cheese topping. That contrast between silky sauce and baked top layer is what makes it so special.
Unlike many fast-food macs that feel overly processed or bland, this one tastes homemade. The sauce is thick and rich, coating every elbow of pasta. There’s a sharpness from the cheddar, a nutty saltiness from the Parmesan and Romano, and a buttery smooth base that ties everything together.
What makes it stand out is the balance. It’s creamy but not soupy. Cheesy but not greasy. Comforting but not heavy in a way that makes you regret it.
And today, we’re recreating that magic in your own kitchen—with real ingredients and a whole lot of love.
Equipment List
Before we start cooking, here’s what you’ll need:
- Large pot (for boiling pasta)
- Colander
- Medium heavy-bottom saucepan
- Whisk
- Wooden spoon or silicone spatula
- 9×13-inch baking dish
- Measuring cups and spoons
- Cheese grater (if shredding fresh cheese)
- Oven
Nothing fancy. Just good, reliable kitchen tools.
Recipe Card Info
Prep Time: 15 minutes
Cook Time: 35 minutes
Total Time: 50 minutes
Serves: 6
Cuisine: American
Course: Dinner
Calories: 460 calories per serving
Ingredients
Here’s everything you’ll need to recreate this creamy classic:
- 16 ounces elbow macaroni (uncooked)
- 4 tablespoons unsalted butter
- 4 tablespoons all-purpose flour
- 3 cups whole milk (room temperature)
- 1 cup heavy cream
- 2 cups sharp cheddar cheese, freshly shredded
- 1 cup mild cheddar cheese, freshly shredded
- 1/2 cup grated Parmesan cheese
- 1/2 cup grated Romano cheese
- 1/2 teaspoon salt (adjust to taste)
- 1/2 teaspoon black pepper
- 1/2 teaspoon paprika (optional, for warmth)
- 1/4 teaspoon garlic powder
For the topping:
- 1/2 cup shredded cheddar cheese
- 2 tablespoons grated Parmesan cheese
Freshly shredded cheese makes a huge difference here. Pre-shredded cheese contains anti-caking agents that can make the sauce grainy. Trust me—grate it yourself if you can.
Instructions (Step-by-Step)
Step 1: Cook the Pasta
Bring a large pot of salted water to a rolling boil. Add the elbow macaroni and cook until just al dente according to package instructions.
Do not overcook. The pasta will continue cooking in the oven later.
Drain and set aside.
Step 2: Make the Roux
In a medium saucepan over medium heat, melt the butter completely. Once melted, add the flour.
Whisk continuously for about 1–2 minutes. You want the raw flour taste to cook out, but don’t let it brown. It should look smooth and slightly bubbly.
Step 3: Build the Cream Sauce
Slowly pour in the whole milk while whisking constantly. Then add the heavy cream.
Keep whisking to prevent lumps. Cook for about 4–5 minutes, until the mixture thickens and coats the back of a spoon.
Lower the heat.
Step 4: Add the Cheese
Add the sharp cheddar, mild cheddar, Parmesan, and Romano cheese a handful at a time. Stir gently until fully melted before adding more.
Season with salt, black pepper, paprika, and garlic powder.
Taste the sauce. Adjust seasoning if needed.
At this stage, the sauce should be thick, creamy, and luxuriously smooth.
Step 5: Combine Pasta and Sauce
Add the cooked macaroni into the cheese sauce. Stir until every piece is beautifully coated.
Pour everything into a lightly greased 9×13-inch baking dish.
Step 6: Add the Topping
Sprinkle the additional cheddar and Parmesan evenly over the top.
This is what gives that signature baked finish.
Step 7: Bake
Preheat your oven to 375°F (190°C).
Bake uncovered for 20 minutes, or until the top is melted and lightly golden brown.
If you want a deeper golden crust, broil for 2–3 minutes at the end—but watch closely.
Let it rest for 5–10 minutes before serving.
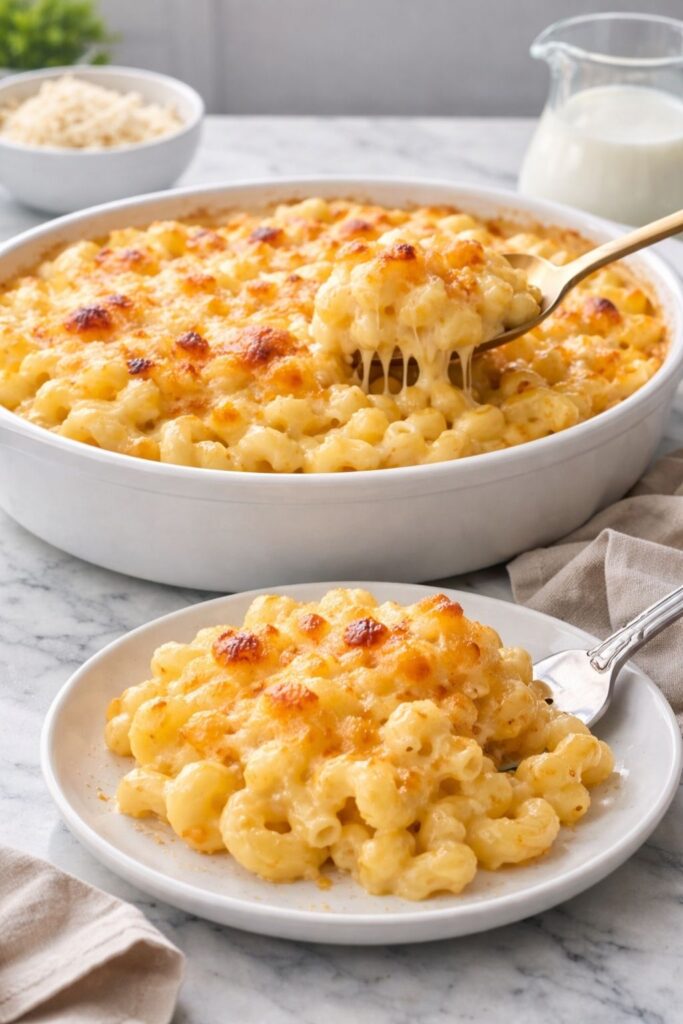
And that’s it. Your homemade Chick-fil-A Mac and Cheese is ready.
Why This Recipe Works
As a chef, I’m very particular about texture. This recipe works because it builds layers of flavor and structure.
The butter and flour create a stable base (roux) that thickens the milk and cream into a silky sauce. The combination of whole milk and heavy cream gives body without making it greasy.
Sharp cheddar provides bold flavor. Mild cheddar smooths it out. Parmesan and Romano add depth and that slightly salty, nutty kick that makes the sauce taste more complex.
Then baking it? That’s the final touch. The oven transforms the top layer into something slightly crisp and caramelized while keeping the inside creamy.
It’s contrast. And contrast is everything in cooking.
Flavor Profile: What to Expect
This isn’t bland mac and cheese.
It’s:
- Creamy and smooth
- Buttery and rich
- Sharp and cheesy
- Slightly nutty from the aged cheeses
- Comforting in the best way possible
Each bite melts into the next. The sauce clings to the pasta without pooling at the bottom. The baked top gives a gentle resistance before you sink into the creamy center.
It tastes homemade because it is.
Tips From My Kitchen
1. Use Room Temperature Dairy
Cold milk can shock the roux and cause lumps. Let your milk and cream sit out for a few minutes before cooking.
2. Shred Your Own Cheese
I know I already said this—but it matters. Freshly shredded cheese melts smoother and tastes better.
3. Don’t Overbake
If you bake too long, the sauce tightens up. You want creamy, not dry.
4. Season in Layers
Taste as you go. Cheese varies in saltiness. Adjust slowly.
Make It Ahead
You can assemble everything (without baking), cover tightly, and refrigerate for up to 24 hours.
When ready to bake, let it sit at room temperature for 20 minutes, then bake as directed. You may need an extra 5 minutes in the oven.
Perfect for holidays or dinner parties.
Storage and Reheating
Store leftovers in an airtight container in the refrigerator for up to 4 days.
To reheat:
- Add a splash of milk
- Cover with foil
- Warm in a 325°F oven until heated through
This keeps it creamy.
Microwaving works too, but stir halfway through and add milk to prevent dryness.
What to Serve With It
This dish pairs beautifully with:
- Grilled chicken
- Fried chicken
- BBQ ribs
- Meatloaf
- Roasted vegetables
- Fresh green salad
Honestly? Sometimes I just eat a bowl on its own with a spoon while standing in my kitchen. No judgment.
Variations You Can Try
Once you master the base recipe, you can play.
- Add crispy bacon bits
- Stir in sautéed jalapeños for heat
- Mix in smoked gouda for depth
- Top with buttery breadcrumbs for extra crunch
But if you want that classic Chick-fil-A Mac and Cheese experience, stick to the original blend.
Frequently Asked Questions
Can I freeze it?
You can, but cream-based sauces sometimes change texture. If freezing, wrap tightly and thaw overnight in the fridge before reheating.
Can I use a different pasta shape?
Yes, but elbow macaroni holds the sauce best. Shells also work beautifully.
Why is my sauce grainy?
Usually from pre-shredded cheese or heat that’s too high. Lower heat and add cheese gradually.
Final Thoughts
There’s something deeply nostalgic about baked macaroni and cheese. It reminds me why I fell in love with cooking in the first place. Simple ingredients—pasta, butter, milk, cheese—transformed into something that makes people close their eyes when they take a bite.
Recreating Chick-fil-A Mac and Cheese at home isn’t just about copying a restaurant dish. It’s about bringing that feeling into your own space. About gathering around a table and passing a dish that disappears faster than you expected.
I hope you make it. I hope you tweak it. I hope it becomes part of your comfort food rotation.
And when someone asks for the recipe? Smile and say, “It’s homemade.”
More Recipes:

Chick-fil-A Mac and Cheese Recipe
Equipment
- Large pot (for boiling pasta)
- Colander
- Medium heavy-bottom saucepan
- Whisk
- Wooden spoon or silicone spatula
- 9×13-inch baking dish
- Measuring Cups and Spoons
- Cheese grater (if shredding fresh cheese)
- Oven
Ingredients
- 16 ounces elbow macaroni uncooked
- 4 tablespoons unsalted butter
- 4 tablespoons all-purpose flour
- 3 cups whole milk room temperature
- 1 cup heavy cream
- 2 cups sharp cheddar cheese freshly shredded
- 1 cup mild cheddar cheese freshly shredded
- 1/2 cup grated Parmesan cheese
- 1/2 cup grated Romano cheese
- 1/2 teaspoon salt adjust to taste
- 1/2 teaspoon black pepper
- 1/2 teaspoon paprika optional, for warmth
- 1/4 teaspoon garlic powder
For the topping:
- 1/2 cup shredded cheddar cheese
- 2 tablespoons grated Parmesan cheese
Instructions
Step 1: Cook the Pasta
- Bring a large pot of salted water to a rolling boil. Add the elbow macaroni and cook until just al dente according to package instructions.
- Do not overcook. The pasta will continue cooking in the oven later.
- Drain and set aside.
Step 2: Make the Roux
- In a medium saucepan over medium heat, melt the butter completely. Once melted, add the flour.
- Whisk continuously for about 1–2 minutes. You want the raw flour taste to cook out, but don’t let it brown. It should look smooth and slightly bubbly.
Step 3: Build the Cream Sauce
- Slowly pour in the whole milk while whisking constantly. Then add the heavy cream.
- Keep whisking to prevent lumps. Cook for about 4–5 minutes, until the mixture thickens and coats the back of a spoon.
- Lower the heat.
Step 4: Add the Cheese
- Add the sharp cheddar, mild cheddar, Parmesan, and Romano cheese a handful at a time. Stir gently until fully melted before adding more.
- Season with salt, black pepper, paprika, and garlic powder.
- Taste the sauce. Adjust seasoning if needed.
- At this stage, the sauce should be thick, creamy, and luxuriously smooth.
Step 5: Combine Pasta and Sauce
- Add the cooked macaroni into the cheese sauce. Stir until every piece is beautifully coated.
- Pour everything into a lightly greased 9×13-inch baking dish.
Step 6: Add the Topping
- Sprinkle the additional cheddar and Parmesan evenly over the top.
- This is what gives that signature baked finish.
Step 7: Bake
- Preheat your oven to 375°F (190°C).
- Bake uncovered for 20 minutes, or until the top is melted and lightly golden brown.
- If you want a deeper golden crust, broil for 2–3 minutes at the end—but watch closely.
- Let it rest for 5–10 minutes before serving.
- And that’s it. Your homemade Chick-fil-A Mac and Cheese is ready.

Norma Parker is a recipe creator at Nomqom.com. She shares simple, tasty, and easy home-cooking ideas for everyday meals. Her goal is to help home cooks make delicious food with confidence.